 Skip to content
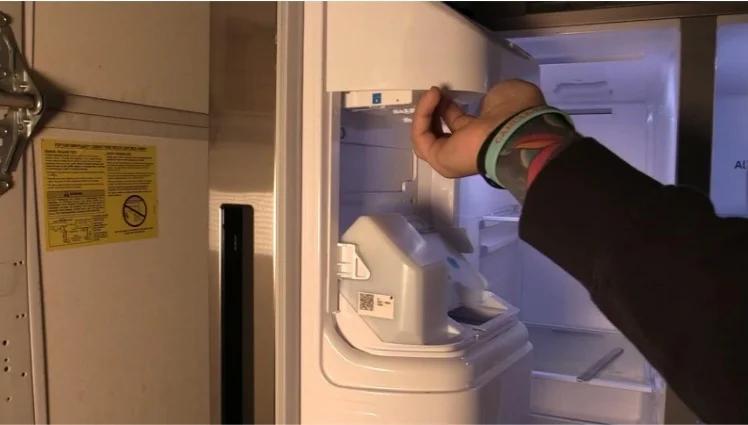
Dealing with a malfunctioning ice maker can be frustrating, especially when it affects your daily routine. If you’re wondering how to remove ice maker from a Samsung refrigerator, you’re in the right place.
Whether you need to replace a broken unit, perform maintenance, or troubleshoot issues, this comprehensive guide will walk you through the entire process step by step.
Samsung refrigerators are known for their innovative features, but ice makers can sometimes require attention. Understanding the proper removal process can save you time and money while ensuring you don’t damage your appliance in the process.
Why You Might Need to Remove Your Samsung Ice Maker
Before diving into the removal process, it’s important to understand common reasons why homeowners need to remove their ice makers.
Common Issues Requiring Ice Maker Removal:
Ice makers that stop producing ice, make excessive noise, or leak water often need to be removed for inspection or replacement. According to appliance repair industry data, ice maker failures account for approximately 30% of all refrigerator service calls.
Sometimes the ice maker produces small or hollow ice cubes, indicating mineral buildup or mechanical failure. Other times, the unit may freeze over completely, requiring removal for defrosting and cleaning.
If you’re experiencing issues with your Samsung ice maker, you might want to check out our detailed guide on how to fix Samsung ice maker before proceeding with removal.
Tools and Materials You’ll Need
Proper preparation makes the removal process much smoother. Here’s a comprehensive table of everything you’ll need:
| Tool/Material | Purpose | Notes |
| Phillips head screwdriver | Remove mounting screws | Most Samsung models use Phillips screws |
| Flathead screwdriver | Pry plastic clips | Use with caution to avoid breaking clips |
| Towels | Catch water drips | Have several on hand |
| Container or bucket | Collect excess water | Place under work area |
| Flashlight | Improve visibility | Essential for dark freezer interior |
| Gloves | Protect hands | Insulated gloves work best |
| Camera or smartphone | Document wire connections | Makes reassembly easier |
Safety Precautions Before You Begin
Safety should always be your top priority when working with any appliance.
Essential Safety Steps:
Always unplug your refrigerator from the electrical outlet before beginning any work. This prevents electrical shock and protects the appliance’s control board from potential damage.
Turn off the water supply to the ice maker. Most Samsung refrigerators have a shut-off valve either behind the unit or under the kitchen sink. Turning off water prevents flooding and makes the job cleaner.
Remove all food items from the freezer section. This gives you ample working space and prevents food from spoiling during the process.
Allow at least 30 minutes for any ice to melt slightly if the ice maker is frozen. This makes removal easier and reduces the risk of breaking plastic components.
Step-by-Step Ice Maker Removal Process
Now let’s walk through the actual removal process in detail.
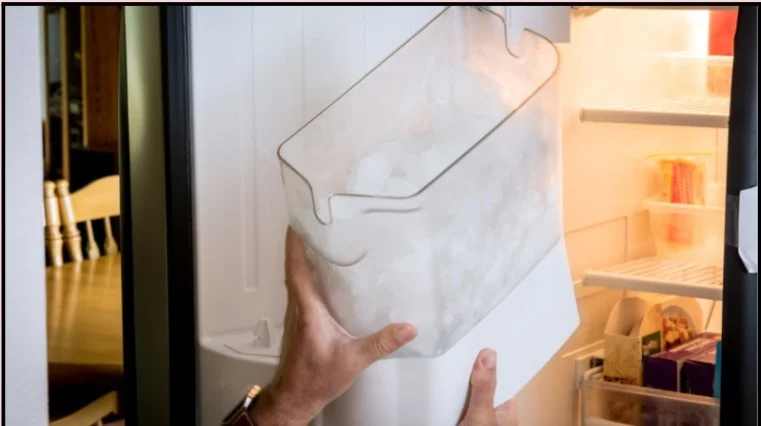
Step 1: Access the Ice Maker
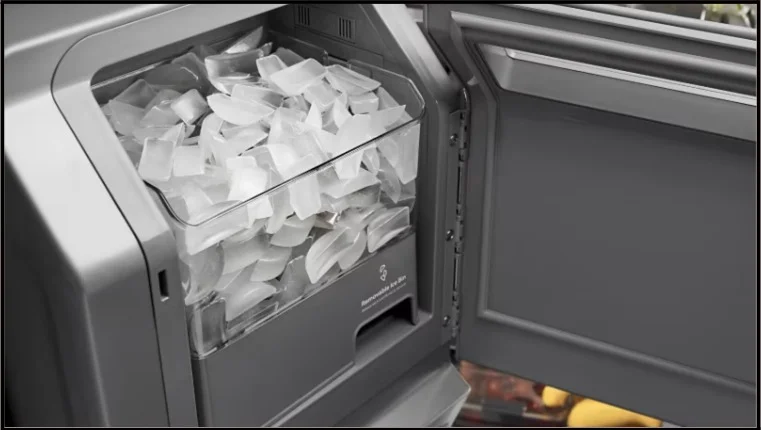
Open your freezer door completely and remove the ice bin. Most Samsung models have a bin that slides out or lifts up. Set it aside in a safe location.
Clear any shelving or drawers that might obstruct your access to the ice maker mounting area. You need full visibility and reach to work effectively.
Step 2: Disconnect the Water Line
Locate the water line connection at the back or side of the ice maker. This is typically a small plastic or copper tube.
Take a photo of the connection before disconnecting. This reference will be invaluable during reinstallation.
Gently press the release tab or turn the compression fitting counterclockwise to disconnect the water line. Keep your towel handy as some water will drip out.
Step 3: Disconnect Electrical Connections
Find the wire harness that powers your ice maker. Samsung models typically have a plug-style connector that’s easy to identify.
Press the release tab on the connector and gently pull it apart. Never yank or pull on the wires themselves, only on the plastic connector housing.
If your model has multiple connections, photograph each one before disconnecting to ensure proper reassembly.
Step 4: Remove Mounting Hardware
Most Samsung ice makers are secured with two to four mounting screws. These are usually located on the side or top of the ice maker assembly.
Use your Phillips head screwdriver to remove these screws completely. Place them in a secure container so they don’t get lost.
Some models also have plastic clips or tabs that need to be released. Gently pry these with a flathead screwdriver if needed.
Step 5: Remove the Ice Maker Unit
With all connections and mounting hardware removed, carefully tilt the ice maker forward and lift it up and out of the freezer compartment.
Be gentle during this step as the plastic housing can crack if forced. If the unit doesn’t come out easily, double-check for any remaining screws or clips.
Set the removed ice maker on a towel on your counter for inspection or disposal.
Common Samsung Ice Maker Models and Removal Variations
Different Samsung refrigerator models may have slight variations in ice maker design. Here’s a helpful comparison:
| Model Type | Ice Maker Location | Key Difference |
| French Door Models | Left side of freezer | Usually has external access panel |
| Side-by-Side Models | Top of freezer section | May require shelf removal first |
| Top Freezer Models | Ceiling of freezer | Often uses different mounting system |
| 4-Door Flex Models | Separate ice maker drawer | Independent unit with different connections |
Understanding your specific model helps you anticipate any unique challenges during removal.
Troubleshooting Common Removal Challenges
Sometimes the removal process doesn’t go as smoothly as planned.
Stuck or Frozen Ice Maker:
If your ice maker won’t budge, it may be frozen to the freezer wall. Use a hair dryer on low heat to gently warm the area. Never use high heat or sharp objects to chip away ice.
Difficult Wire Connectors:
Some wire harnesses can be stubborn. Apply gentle, even pressure while wiggling the connector slightly. If it still won’t release, check for a hidden release mechanism.
Stripped Screws:
If mounting screws are stripped or corroded, use a rubber band between the screw head and screwdriver for better grip. A screw extractor kit may be necessary for severely damaged screws.
What to Do After Removal
Once you’ve successfully removed your ice maker, you have several options.
Inspection and Cleaning:
Examine the removed unit for visible damage, cracks, or mineral buildup. Clean any accessible parts with warm soapy water.
Check the mounting area in your freezer for ice buildup or debris. Clean and dry this area thoroughly before installing a new unit.
Installation of New Unit:
If you’re installing a replacement ice maker, simply reverse the removal steps. Make sure all connections are secure and the unit is properly mounted.
For help with related repairs, visit our comprehensive Samsung appliance repair page.
When to Call a Professional
While removing an ice maker is a manageable DIY task for many homeowners, certain situations warrant professional help.
Call a professional if you encounter electrical issues beyond simple connector disconnection. Licensed technicians have the expertise to handle complex wiring safely.
If your refrigerator is still under warranty, professional service may be required to maintain coverage. Check your warranty terms before attempting DIY repairs.
Water line issues that involve wall penetrations or complex plumbing should be handled by professionals to prevent water damage.
Our team offers expert refrigerator repair services if you need professional assistance.

Industry Statistics on Ice Maker Repairs
Understanding the broader context of ice maker issues can help you make informed decisions:
Research shows that ice makers have an average lifespan of 3 to 10 years depending on usage and water quality. Homes with hard water experience ice maker failures 40% more frequently than those with soft water.
The average cost of professional ice maker replacement ranges from $250 to $400, while DIY replacement costs between $100 and $200 for parts only.
Approximately 65% of ice maker problems can be resolved through cleaning and minor adjustments rather than full replacement.
Preventing Future Ice Maker Problems
Taking preventive measures can extend your ice maker’s life significantly.
Replace your water filter every six months as recommended by Samsung. Old filters reduce water flow and ice production quality.
Clean your ice bin monthly to prevent bacterial growth and odor transfer. Simply wash with warm soapy water and dry completely.
Check water line connections annually for leaks or loose fittings. Early detection prevents major water damage.
For more maintenance tips, explore our guide on refrigerator repair.
Final Thoughts
Learning how to remove ice maker from a Samsung refrigerator empowers you to handle basic maintenance and repairs yourself. This skill saves money and gives you better control over your appliance’s performance.
Remember to always prioritize safety by unplugging the unit and turning off water before starting work. Take photos throughout the process to guide your reinstallation.
Whether you’re troubleshooting issues, replacing a failed unit, or performing routine maintenance, following these steps ensures a successful outcome. When in doubt, don’t hesitate to consult professional appliance repair services for assistance.
Keep your refrigerator running smoothly by staying proactive with maintenance and addressing issues promptly. Your Samsung refrigerator is a significant investment, and proper care ensures years of reliable service.